Last Updated on
Microstation dgn’s that were created outside of ProjectWise that have references attached to outside documents must have the reference links reestablished once brought into ProjectWise. ProjectWise has a built-in tool that will automate this process once the Microstation dgn’s have been saved into ProjectWise.
Moving the files into ProjectWise
- Create a new project in ProjectWise.
- Browse to the specialty group the files will be located under.
![]()
- Move (drag and drop) the Parent dgn’s into the Plan Sheets folder.
- Move (drag and drop) the reference dgn’s into the Reference Files folder.
- In Projectwise, the parent dgns (located in the Plan Sheets folder) have the standard Microstation Icon displayed.
Note: If the Microstation dgn has at least one reference file attached, the icon is changed to the Microstation Icon
showing a reference file in the lower right corner.
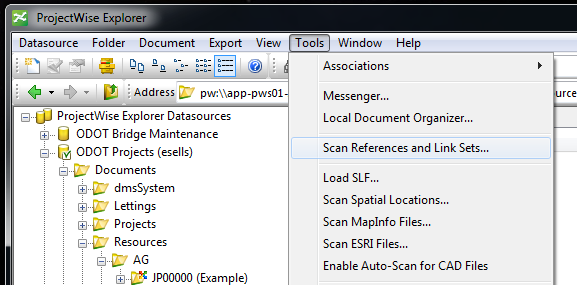
Reestablish Links
- Tools > Scan References and Link Sets…
- Click Next
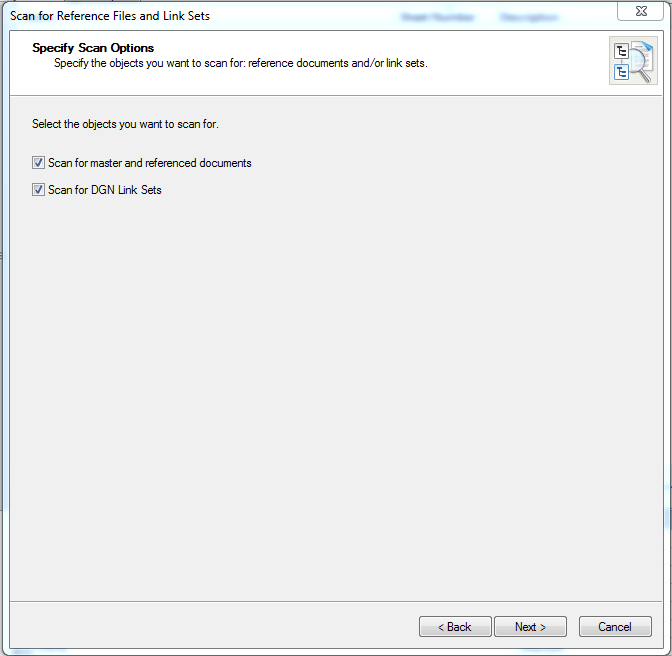
- In the Specify Scan Options panel, check-mark both “Scan for master and referenced documents” and “Scan for DGN Link Sets”. Click NEXT.
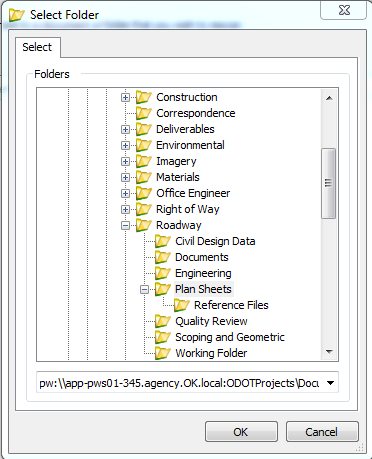
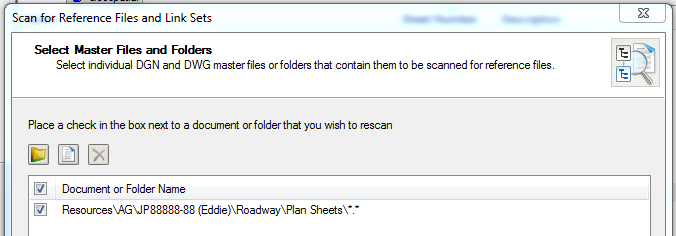
- In the Select Master Files and Folders panel, click the folder icon.

- If not defaulted, locate and select the folder for which the scan should be completed in and click OK.
Note: Instead of choosing the folder icon as stated above, the user has the option of selecting a single document. If this is the case, the user selects the document icon located in the Select Master Files and Folders panel and browsing to the specific document.
- After the folder or specific file is located and selected, the wizard will display your selection(s) in the same panel. Once confirmed, click Next.
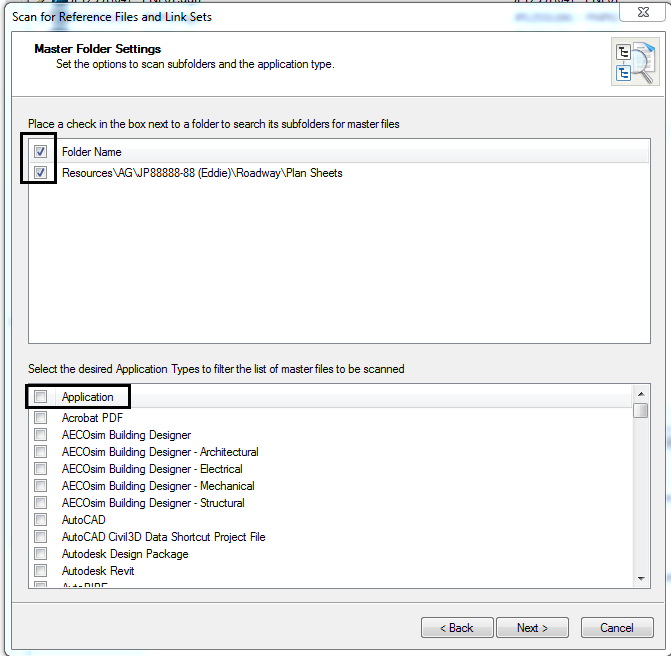
- In the Master Folder Settings panel, and in the upper window, check-mark the directory or specific file that should be scanned. In the lower window check-mark what document types (by application) that should scanned for. Once all settings are confirmed, click Next.
Note: The user can speed the process of selecting application types by simply placing a check-mark next to Application. This will select every application.
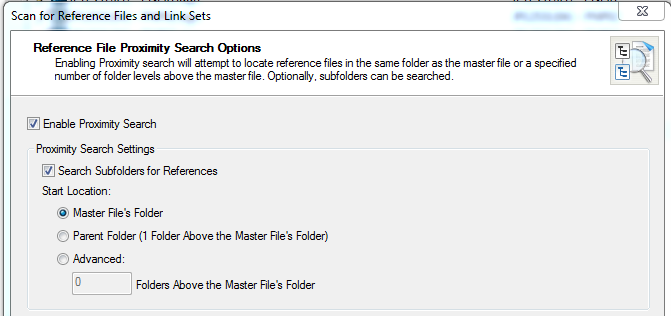
- In the Reference File Proximity Search Options panel, check-mark “Enable Priority Search”. Click the folder icon and browse to where the reference files are located. Click Next.

- In the Reference File Priority Search Options panel, check-mark both “Enable Proximity Search” and “Search Subfolders for References”. Click Next.
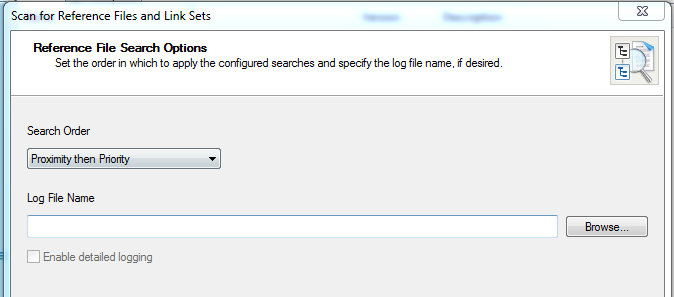
- Leave defaults and click Next. The ProjectWise wizard will run and display the results in a dialog box.