
Last Updated on
Linking a ProjectWise document to a MicroStation drawing allows for changes made to the document to be automatically reflected in the MicroStation drawing. This is a two stage process. The first step is to create a group of documents called a Document Set. The second step is to use the set to link the documents with the MicroStation drawing.
Creating a Document Set
- In the ProjectWise Explorer select the folder where the parent drawing is located. This will usually be the …\Plan Sheets folder of the specialty group.
- Right-click on the parent drawing file and select Set > New from the menu. The Create Document Set dialog box will open.
- Enter a Name and Description for the new document set. Using the name of the MicroStation file as the Name will associate the document set with the MicroStation file. Click OK.

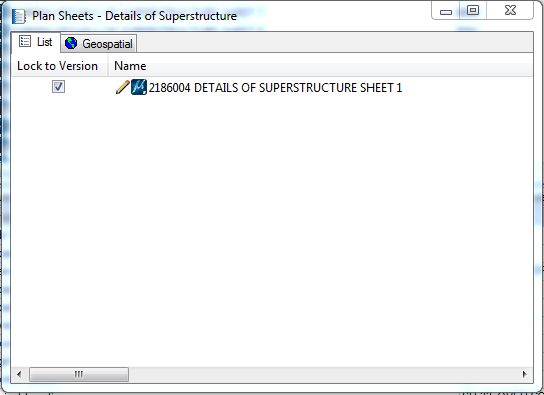
The Document Set window will appear with the parent draw listed in the window.
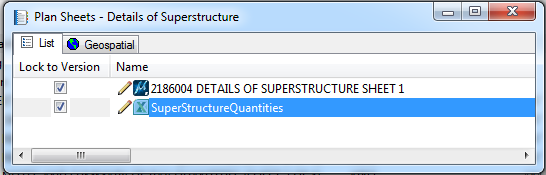
- Drag any Excel or Word documents from the ProjectWise Explorer that will be referenced to the parent drawing into the document set window.
Note: Although documents can be added to the Document Set from any folder within the active ProjectWise datasource, ideally they should be added from folders within the same project.
- Once all of the desired documents are added to the document set, close the document set window. The Document Set will appear in the ProjectWise Explorer window as indicated by the
 icon. It should be noted, a document set is not a file and therefore cannot exist outside of ProjectWise.
Once a document set has been created, all files associated with the drawing file can be checked in/out as a complete set. Using the document set to check in/out files ensures that the correct files are being used in the linked document and are available to other team members when changes are made to the base files.
Linking Documents to a Microstation Drawing File
The following steps illustrate how to link Excel and Word documents to a MicroStation drawing file using document sets. Since ProjectWise copies a document to a local folder upon checkout and these files are not always deleted when the document is checked in, this method of linking provides for the most reliable results when working in a team environment.
To link an Excel or Word document to a MicroStation file:
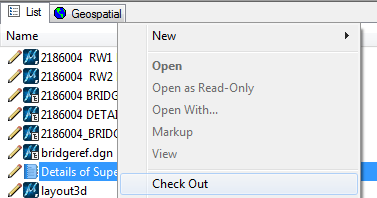
- Right-click the document set in the ProjectWise Explorer window and select Check Out. This copies all the files in the document set to the ProjectWise working folder on your computer and locks the files in ProjectWise from being edited.
- From ProjectWise Explorer double-click on the document set. This will open the document set window which will be used to verify the status of documents as you use them in the following steps. Notice, that because the document set was checked out, all associated files are checked out as well. If the document set window does not open up, simply double click on the document set to open it.
- Open the MicroStation drawing and any documents that will be linked to the drawing file.
- Select the data in the document that will be linked to the drawing. This method will work for text in a Word document, rows and columns in an Excel spreadsheet, or other data. The following example is an Excel document.
- Press Ctrl-C to copy the data to the clipboard.
- Switch over to Microstation.
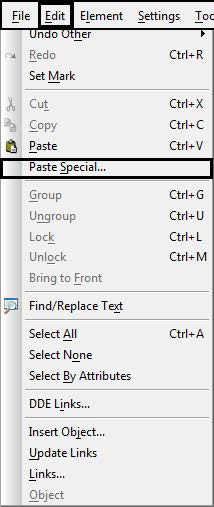
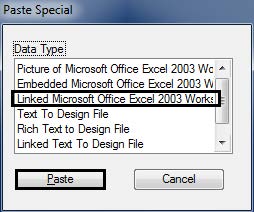
- From Microstation, select Edit > Paste Special
- Select Linked Microsoft Office Excel Worksheet, and then click Paste.
- Set the position and size of the data in the microstation drawing.
- Repeat the steps 4-9 for any additional documents to be included.
- When either the Microstation or the Microsoft Office files are closed, ProjectWise displays the Check In box. Click the Check In button. This will update the server copy of the document.
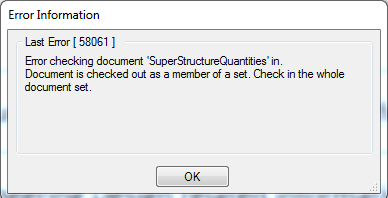
Note: The following error message may be displayed. This message occurs because the documents were all checked out as a set and need to be checked in as a set. If this error message appears, click the OK button and proceed to the next step.
- The final step is to check in the document set. Right-click on the document set in the ProjectWise Explorer window and select Check In. This will check in all documents associated with the document set and update the server copy of those documents.
Looking at the document set window, notice that since the document set was checked in, all associated documents are checked in as well.
