
Last Updated on
Digital copies of the Title Sheet, or any other signature sheet, shall be digitally signed and locked by the Engineer.
1. Open the document within ProjectWise. The document opens into Adobe Pro ready for editing.
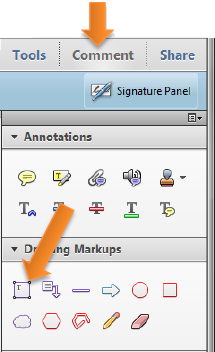
2. Within the Comment Pane, and under the “Drawing Markups” tools, select the “Add Text Box” Tool. Change the settings to match the example. (if the settings bar is not open, use cntrl+e to invoke it.)


3. Place the date onto the sheet and move it into position.
![]()
4. Within the Tools Pane, and under the “Sign and Certify” tools, choose “Place Signature”. Draw a rectangle as in the location in which you want to place your signature. The rectangle is proportionate to the size of your signature image.
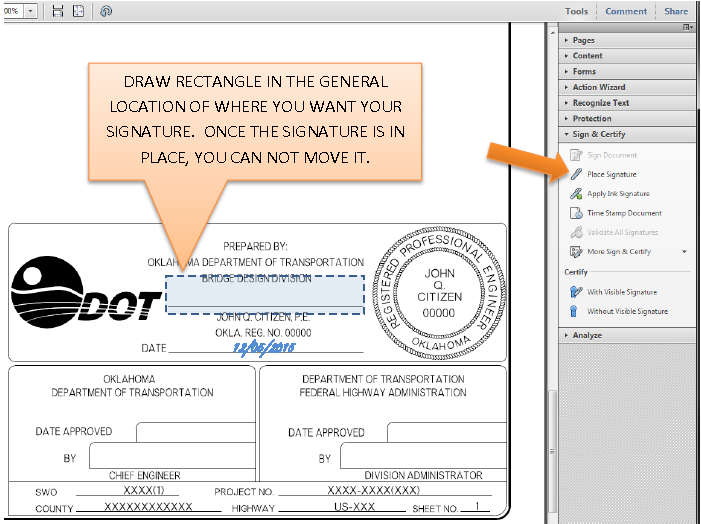
• Once the location of the signature has been chosen, the signature dialog box opens. Here, choose:
o Sign As: coreid@agency.ok.local
o Appearance: “Your signature”
o Lock Document After Signing:
5. Click “Sign” and save the Document in the proper location. The document is now digitally signed, and non-editable.
6. Close all instances of Adobe Pro, and check in the sheet within ProjectWise.
7. Within ProjectWise, locate the document in which the signature was needed. Right-click the document, choose “Properties…” Click the General tab, then click the “Advanced” select box. There, choose import.
8. Locate the Signed Document on your PC. Select it. Complete the import process by clicking the save button on the properties dialog box. If you wish, open the document and verify the document has a digital signature and is locked (within Adobe) from modifications.

Note: In a situation where a title sheet must be revised, following the standard Version/Revision protocol. Import/overwrite the newly created version located within projectwise.
