
Last Updated on
There are several methods available to create a new drawing file. In this chapter we will be discussing creating a new MicroStation file from within MicroStation.
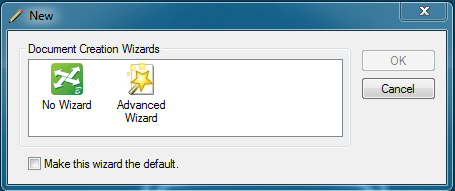
- While in a MicroStation file opened from within ProjectWise, select File>New. The resulting dialog boxes will look different than the MicroStation Manager previously used outside of ProjectWise. The first dialog box opened will be the New Document Creation Wizards. Select No Wizard and click OK.
- The New dialog box will appear. From here the file name, storage location , and seed file are specified.

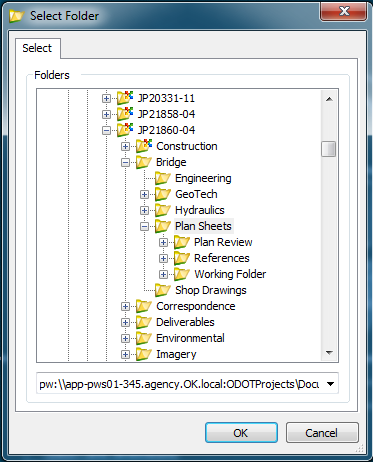
- Select the desired folder for the new drawing by clicking Change… By default, the Select Folder dialog box will open to the folder location of the existing opened file.
- Navigate to the desired folder and click OK.
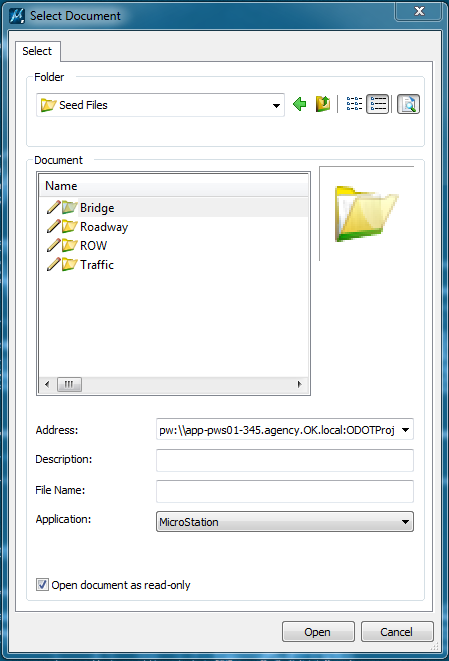
- Select the correct seed file from the ProjectWise seed file directory by clicking Seed. Be sure to select the Seed File directory and use the seed corresponding to the specialty group you are working with. Below is a link to the Seed File Directory.
…\Documents\Resources\ODOT Workspace SS2\Seed Files\
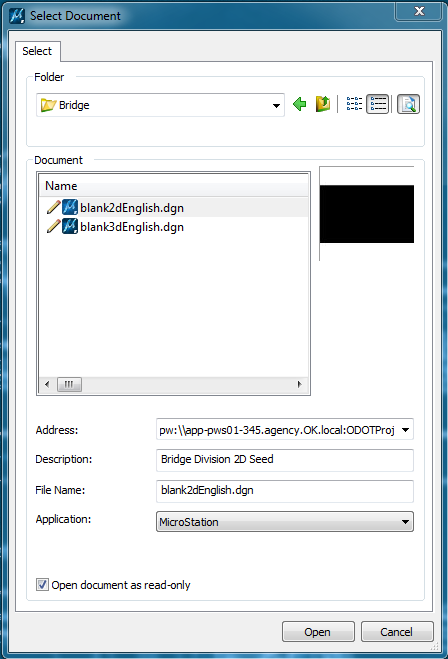
- Click Open and the seed file will be selected. When first opened, the file naming information will be the same as the seed file. The Name fields should match while the Description field can be different.
- Key in the desired Name, Description, and File Name.
- Click OK and the new file will be created and opened.
Note: It is a common mistake to try and use the New>Document Command from the ProjectWise Document pull-down. Do not use this method. This method only creates a place holder for a future file and does not actually create a file that can be used by Microstation.
