
Last Updated on
Users can change the view that is used in the Document list pane from the default view by choosing a different one from the View toolbar. The view selected will be active as long as the user stays in the same folder. As soon as the user navigates to a different folder, the view will change back to the default view.
Note: The order of the columns in the dialog box can easily be re-arranged. To re-arrange columns, left-click on a column and drag and drop it to the desired location.
The user can create a custom view and assign it to the folder. This would allow the user to assign only the columns they wish to see.
1) To create a custom view, go to View > Manage View.
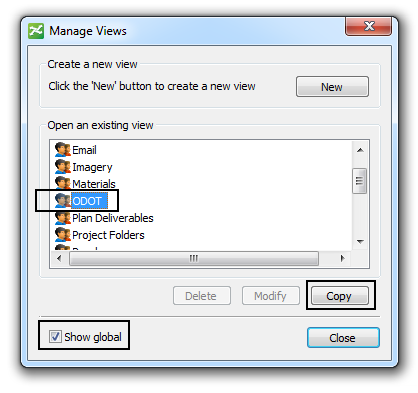
2) Toggle On the show global option, select the Standard view , and click the Copy button.
3) Type in a name for the custom view.
4) Expand the Basic Columns folder to add columns by selecting the heading in the left window and then click the right arrow to add.
5) The order of the columns can be changed by selecting the column name and then using the Up and Down arrow buttons to reorder. Click Ok.
6) Click Close to create the view.
Note: Custom views can be assigned as a default to individual folders. Once assigned, this view will be the default for the user only.
7) Highlight the folder you wish to set a custom view to.
8) Next go to View > Manage Views in ProjectWise Explorer.
9) Select the Set Defaults tab.
10) Toggle On the boxes under Datasource and Search. Click Ok.
11) Close the View Properties dialog box.
